
Friction First: 5 Tools That Remove Pet Hair From Car Interiors
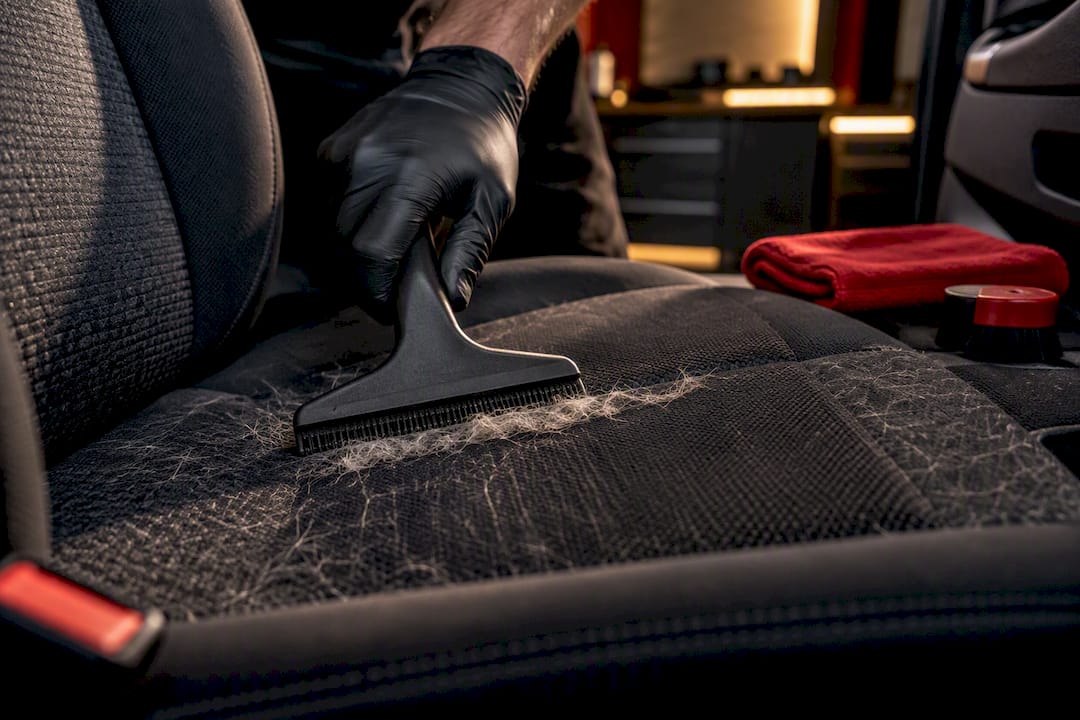
The most reliable pet hair removal car routine follows one order: dry friction first, vacuum second, and wet or spot treatment last. Grab a rubber brush or damp glove to lift embedded hair, capture it with a vacuum fitted with crevice and brush attachments, then finish with a lint roller. If hair persists under seats or the smell won’t quit after two honest attempts, that’s your signal to call a professional detailer instead of buying another gadget.
TL;DR:
Mechanical agitation with rubber tools or damp gloves must precede vacuuming to lift embedded pet hair from tight automotive fabrics, which static and heat tend to lock in place.
The optimal process involves friction passes using rubber tools, followed by targeted vacuuming with crevice and brush attachments, then finishing with a lint roller for fine hairs.
Rubber tools with adjustable tooth spacing and flexibility outperform generic brushes, especially on short or coarse fur, and should be paired with a vacuum offering strong suction and suitable attachments.
Heavy or persistent pet hair, especially when combined with odors or deep-seated buildup, often requires professional services like hot-water extraction or steam cleaning for thorough removal.
Regular preventive measures, including grooming pets before travel and using protective covers, significantly reduce the need for intensive cleaning and professional intervention.
Table of Contents
Why Pet Hair Removal in Cars Requires a Different Approach
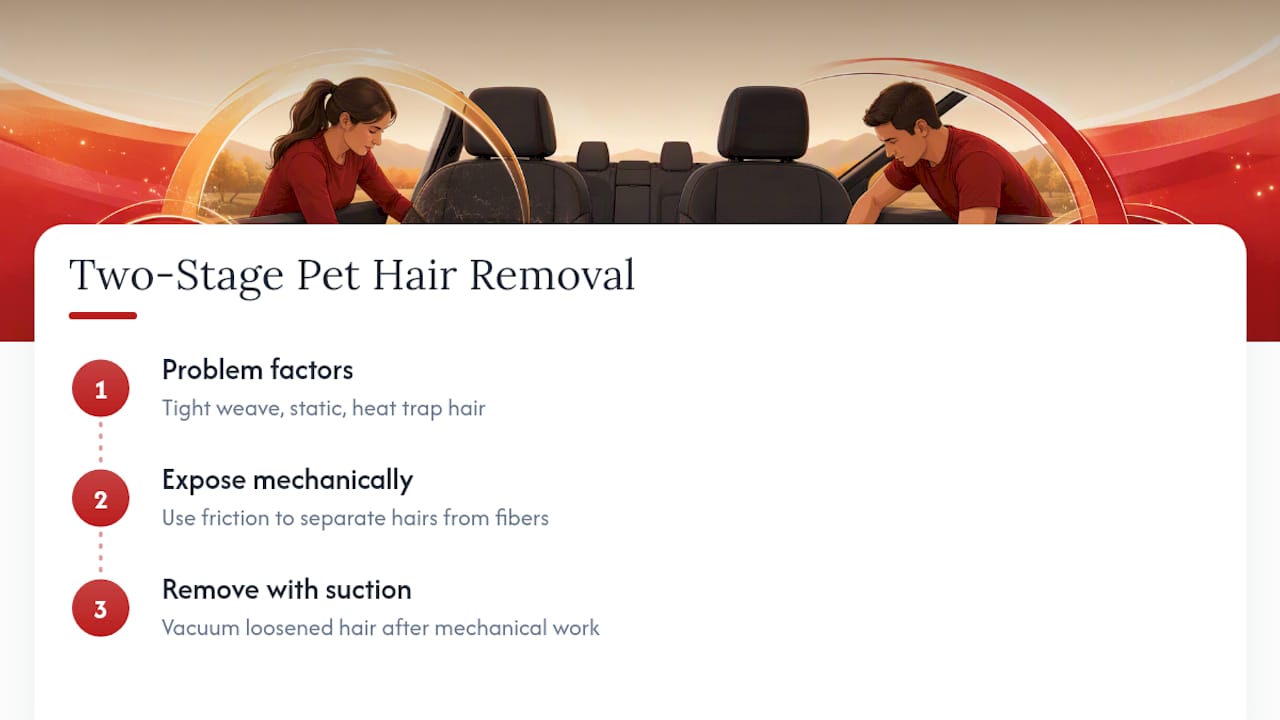
Car upholstery holds hair far more stubbornly than your living room couch, and it’s not your imagination. The weave in automotive fabric is tighter than home furniture fabric, which means individual hairs get physically trapped between fibers rather than just resting on top. Add in static generated by vinyl and plastic trim, plus daily heat cycles that bake the car’s interior, and you get hair that practically welds itself to the seat.
That combination is why vacuuming alone so often fails. A vacuum pulls at hair from one direction, but embedded fibers need to be mechanically separated from the fabric weave before suction can do anything useful. Skip that step and you’re just running the vacuum over hair that isn’t going anywhere. Fabric weave, static, and heat all work against you at once, which is exactly why the correct order of operations matters more than which specific tool you buy.
We treat this as a two-stage problem every time we work on a client’s vehicle: expose the hair mechanically, then remove it with suction. Everything else is a supporting detail.
What Tools Should You Use to Remove Pet Hair From a Car?
You don’t need a garage full of gear. Five tools cover almost every pet hair job we’ve seen, from a light-shedding lap dog to a Labrador who leaves fur on everything within three feet.
Rubber pet-hair brush or squeegee. This is your first pass on seats and carpet. The rubber edge grips embedded hair and drags it loose from the weave instead of just pushing it around.
Vacuum with crevice and soft brush attachments. A shop vacuum or a dedicated car vacuum captures what the brush loosens. The crevice tool gets into seat seams and rails; the soft brush works larger flat areas without scratching trim.
Lint roller or adhesive sheets. Save this for the final pass. It picks up the fine, stray hairs that survived friction and suction, especially on flat upholstery panels.
Damp rubber gloves or a spray bottle. Moisture knocks down static, which is often what’s making hair cling to fabric and trim in the first place. A light mist, not a soak, helps rubber tools sweep hair into piles that are easy to vacuum up.
Small detail tools. A narrow crevice nozzle, a long thin scraper, and a stiff upholstery brush handle the tight spots: seat rails, door pockets, and trunk folds where hair likes to hide.
Buy the rubber tool and the vacuum attachments first. Everything else is cheap and easy to add once you see how your specific car and pet combination behaves.
How Do You Remove Pet Hair From a Car Step by Step?
Here’s the full routine, broken down by zone, that we’d run on any vehicle coming in for interior work.
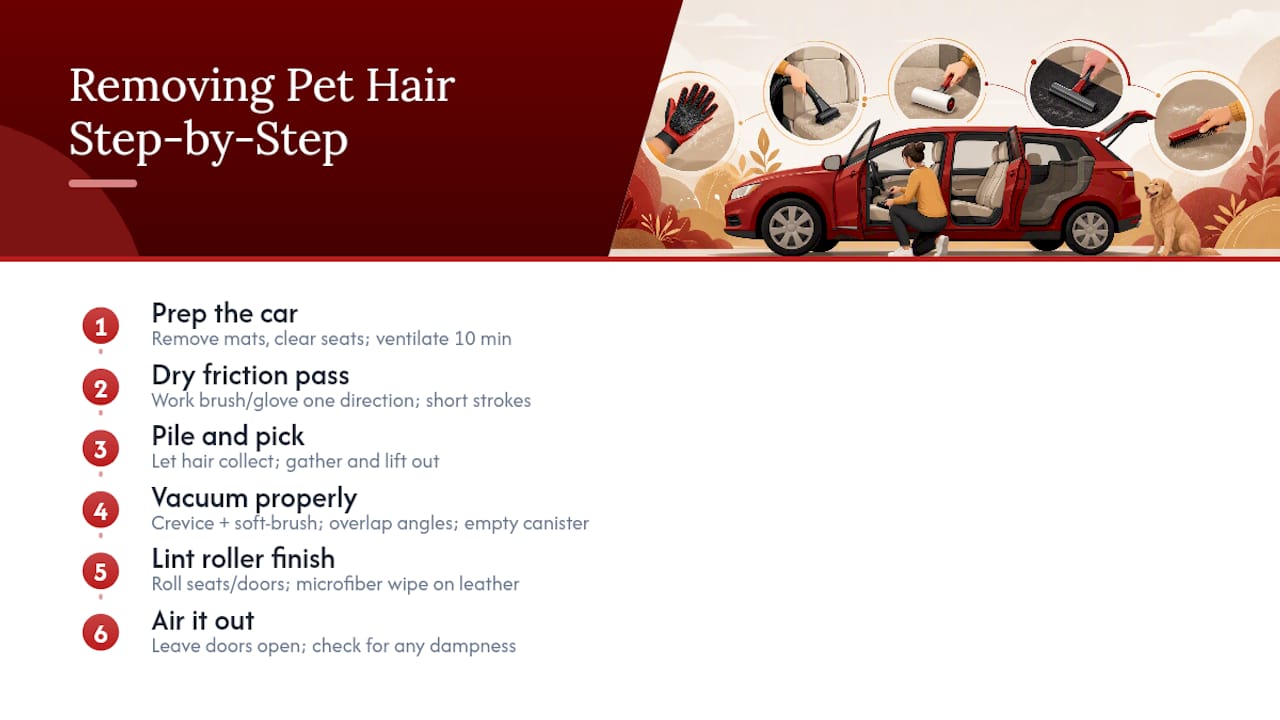
1. Prep the car. Pull out floor mats, clear loose items off seats, and open all four doors. Ten minutes of ventilation before you start makes the whole job less miserable, especially in warm weather.
2. Run the dry friction pass first. This is the step people skip, and it’s the one that actually matters. Work the rubber brush, squeegee, or damp glove in one consistent direction, section by section, rather than scrubbing randomly. Short strokes toward yourself tend to corral hair better than long sweeping motions. On carpet, press with more pressure than feels natural. On leather or vinyl, ease off so you don’t leave marks.
3. Pile and pick before you vacuum. As you work each section, you’ll notice hair bunching into small rolls or lines. Let it collect rather than immediately chasing it with the vacuum. Once a section is done, gather the piles by hand or with the brush edge and lift them out before they scatter again.
4. Vacuum with the right attachments. Switch to the crevice nozzle for seams, seat rails, and the gap between the seat and console. Use the soft brush attachment on open carpet and upholstery. Work in overlapping strokes from multiple angles, not just front to back, because hair that resists one direction often lifts easily from another. Empty the canister or bag when it starts losing suction. A vacuum working at half power wastes your time.
5. Finish with a lint roller. Once the bulk of the hair is gone, roll a lint roller or adhesive sheet across seats and door panels to catch the fine leftover fibers the brush and vacuum missed. On leather seats, follow with a dry microfiber wipe instead.
6. Air it out. Leave the doors open a few extra minutes and check for any dampness from your misting step. Trapped moisture is how a clean car turns into a smelly one by the next afternoon.
Realistic time estimates vary depending on the intensity of shedding and size of the vehicle. Light shedding on a single seat takes a short amount of time, while heavy shedding or a whole cabin clean for a double-coated breed can require significantly longer, potentially up to about an hour or more overall.
Pro Tip: Run the two-pass rule on any seat where hair looks matted into the weave: dry friction, then vacuum, then repeat the whole sequence once more before you reach for a lint roller. Wipe hair off your brush or glove between passes, because a clogged tool just redistributes hair instead of lifting it.
Why Do These Tools Work, and How Do You Pick the Right Ones?
Rubber works because it grips. Fabric and hair both have some texture to them, and rubber’s slight tackiness catches individual hairs that a smooth plastic scraper would slide right past. That grip is also why misting helps: water reduces the static charge that’s gluing hair to trim and seat fabric, so the rubber tool has less resistance to fight.
When you’re shopping for a rubber brush or squeegee, look at tooth spacing and edge flexibility. Tighter tooth spacing works better on short, fine hair; wider spacing handles longer or coarser fur without clogging. A flexible edge conforms to seat contours and gets into seams; a stiffer edge is better for flat carpet where you want more digging power. Testing by outlets that put multiple pet-hair tools head to head has consistently found that small, specialized rubber extraction tools outperform generic brushes on embedded car carpet hair, which tracks with what we see in the shop.
For vacuums, three specs matter more than horsepower marketing: suction power, motor type, and attachment reach. A brush roll head is fine for open carpet, but a soft, non-marking brush attachment protects vinyl and leather trim. Cordless models buy convenience but lose runtime, so check the battery life against how long a full interior actually takes you.
Lint rollers and adhesive sheets are cheap and disposable, which makes them ideal for a quick touch-up but wasteful as your primary tool for a heavily shedding pet. Reusable rubber tools cost more upfront and pay that back within a couple of cleanings.
Some jobs go past what a brush and vacuum can fix. Years of accumulated hair packed into seat foam, or odor that’s worked its way past the fabric surface, usually needs hot-water extraction or steam, tools that flush the pile rather than just skim it.
How Do You Prevent Pet Hair From Building Up in the Car?
Prevention beats another deep clean every time, and most of it costs less than a single detailing appointment.
Brush or de-shed your pet before they get in the car. A few minutes with a grooming brush at home removes the loose hair that would otherwise end up on your seats.
Use seat covers, a pet hammock, or a cargo liner. Quality covers and liners cut cleaning time significantly because loose hair collects on a surface you can shake out or toss in the wash instead of digging out of factory upholstery.
Keep a compact touch-up kit in the car: a small rubber brush, a lint roller, and a microfiber cloth handle daily shedding before it compounds.
Try an anti-static fabric protectant if your seats are prone to clinging hair, but test it on a hidden patch first since some products discolor certain fabrics.
Designate pet-only seats, train a quick “shake” cue before your pet climbs in, and run a light two-minute cleaning weekly during heavy shedding seasons rather than waiting for a full deep clean.
A well-fitted cover, like the options covered in this guide to protecting upholstery from dog hair, often does more to reduce your workload than any tool upgrade.
How Do You Get Rid of Wet Dog Smell in a Car?
Hair and moisture together are what create lingering odor. Damp fur trapped against fabric keeps dander and bacteria active in the pile long after the hair itself is visible, so odor work only starts once the hair is fully removed and the area is completely dry.
For urine, feces, or other biological messes, use an enzymatic cleaner after your dry hair removal pass, never before. Enzymes need clean fabric contact to break down the source material properly.
Reach for steam extraction, hot-water extraction, or ozone treatment when odor persists after a normal cleaning or when moisture has soaked deep into carpet padding rather than just the surface.
Dry the treated area with real airflow: open windows, point a fan into the cabin, or park in the sun with doors open. Heavy wetting without proper airflow just traps moisture and makes the smell worse in a day or two.
If two full DIY cycles (friction, vacuum, and an enzymatic treatment) haven’t knocked the smell down, that’s your cue to stop troubleshooting and book a steam extraction service instead of a third round of the same routine.
When Is Professional Pet Hair Removal Worth It?
DIY handles most shedding problems, but certain situations are genuinely better left to a detailer with the right equipment. Years of accumulated hair packed into seat foam, fur that’s migrated under the seats and into the tracks, or odor that survives two full cleaning cycles are all signs the job has outgrown a rubber brush and a shop vacuum.
Phenomenal Auto Care runs a dedicated Pet Hair Removal Only service built specifically for cases like this. What separates professional work from a home cleaning isn’t effort, it’s access and equipment: pulling seats to reach embedded hair in the rails, hot-water extraction that flushes dander out of the padding instead of just skimming the surface, and industrial drying that prevents the moisture-plus-hair odor problem from coming right back.
Ask yourself three questions before deciding: Has hair been building for months or years rather than weeks? Have you already tried friction, vacuum, and enzymatic cleaning twice without success? Is the smell coming from somewhere you can’t physically reach? Two or more “yes” answers means it’s time to hand it to a pro.
Book Professional Pet Hair Removal With Phenomenal Auto Care
If the friction-and-vacuum routine only got you partway there, Phenomenal Auto Care’s Pet Hair Removal Only service starts from $35 and goes after exactly the hair a rubber brush and shop vacuum can’t reach: the fur packed into seat rails, under cushions, and deep into carpet padding.

For cars carrying years of accumulated hair alongside stains or odor, Level 2: Complete Detail adds full interior deep cleaning, and Level 3: Full Detail covers the vehicle end to end for anyone dealing with heavier buildup or a car that hasn’t seen a professional cleaning in a while. Every job comes to you: our mobile setup means we bring the extraction equipment, drying tools, and odor treatment right to your driveway or office lot. Before we arrive, just clear personal items from the seats and floor, we’ll handle the rest, hair extraction, spot treatment, and full drying included. Check our mobile detailing coverage in Phoenix or visit our full service list to book a time that works for you.
Sources
The techniques, tool recommendations, and professional-detailing insights in this guide draw on the following sources:
FAQ
What is the best way to remove pet hair from my car?
The most reliable method is dry friction first, using a rubber brush, squeegee, or damp rubber glove to lift embedded hair, followed immediately by vacuuming with a crevice and brush attachment. Skipping straight to the vacuum is the most common mistake, since suction alone rarely pulls hair free from the fabric weave without mechanical separation first.
What is the best tool for removing pet hair from my car?
Rubber-based tools, squeegees, brushes, or damp gloves, consistently outperform other options because rubber grips embedded hair better than plastic or bristle brushes. Pair whichever rubber tool you choose with a vacuum that has a crevice nozzle for seams and rails.
What do detailers use to remove pet hair?
Professional detailers combine rubber extraction tools with vacuums, then move to hot-water extraction or steam for hair and odor packed deep into seat foam and carpet padding. That extraction step is also how pros reach hair under seats and in seat rails that home tools can’t access. Phenomenal Auto Care’s Pet Hair Removal Only service uses this same extraction approach for stubborn cases.
Does a rubber pet hair removal glove really work?
Yes, damp rubber gloves work well for smaller areas and detail work, using the same friction principle as rubber brushes and squeegees. The dampness knocks down static so hair clumps and lifts more easily, though a rubber brush or squeegee typically covers larger seats and carpet sections faster than a glove alone.
How much does professional pet hair removal cost?
Phenomenal Auto Care’s dedicated Pet Hair Removal Only service starts from $35. Heavier cases with embedded odor or staining often call for the Complete Detail package starting from $185, which adds full interior deep cleaning on top of hair extraction.
Recommended
Comments