
50/50 Vinegar: Technician Ladder to Remove Hard Water Spots in AZ
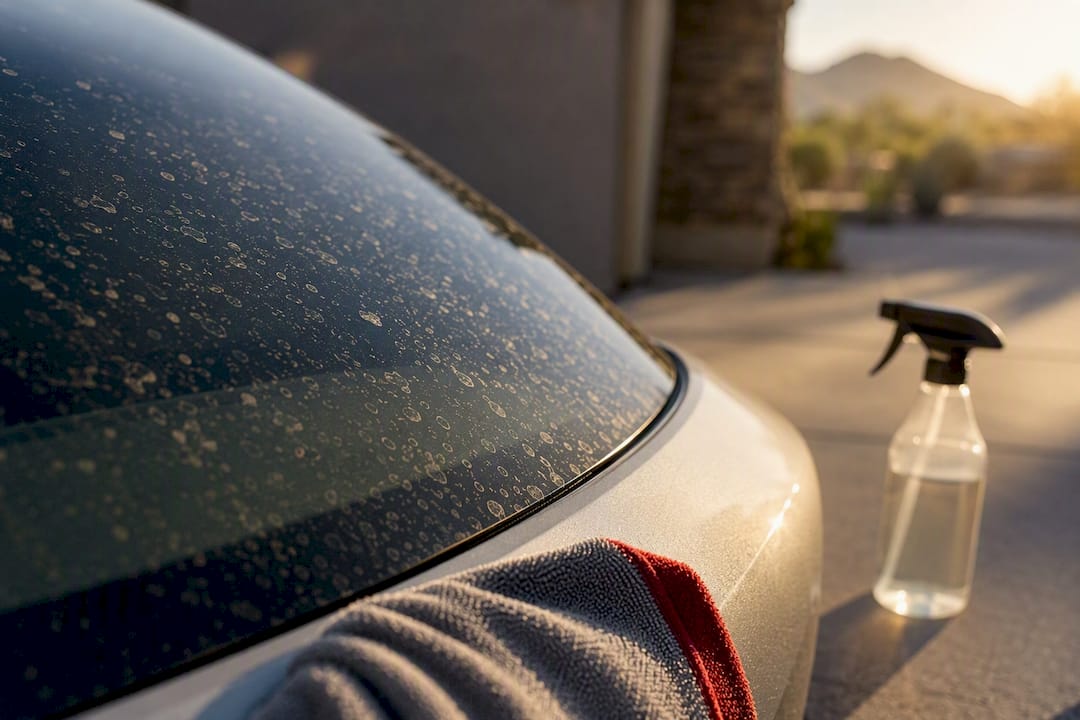
Most hard water spots come off if you catch them early and treat them correctly. Start with a 50/50 mix of distilled white vinegar and distilled water on a cool panel; if the spot lightens or disappears quickly, you’re done. If it doesn’t, you escalate step by step, from a commercial remover to a clay bar to machine polishing, never skipping straight to the most aggressive option.
TL;DR:
Vinegar and water are effective on fresh deposits, but etching requires mechanical polishing or paint correction to prevent damage.
Hard water spots on clear coat can etch the surface if left untreated, especially under heat and sun, which accelerates bonding.
Diagnostic tests like fingernail and baggie assessments help distinguish surface deposits from bonded or etched spots before treatment.
Proper technique in claying and polishing involves patience, clean tools, and gradual escalation to avoid removing too much clear coat.
Preventive measures such as immediate drying, using deionized water for rinsing, and applying ceramic coatings reduce recurrence risks significantly.
Table of Contents
What Causes Hard Water Spots on Car Paint and Glass?
Hard water spots start with calcium and magnesium. Every time water sits on your car and evaporates, it leaves behind the minerals it was carrying, and those minerals don’t just sit on top of the surface. Left in direct sun, they bake in.
We see this constantly on vehicles parked outdoors here in Arizona. The sun heats the panel, the water evaporates faster, and the mineral concentration left behind gets more aggressive by the minute. Heat doesn’t just speed up evaporation. It accelerates the chemical bonding between the mineral deposit and whatever surface it’s sitting on, which is exactly how a spot that would have wiped off in the morning becomes an etched mark by afternoon.
Paint and glass don’t handle this the same way, and understanding why changes how you should treat each one.
Clear coat is a sacrificial polymer layer sprayed over your car’s base color coat. It’s designed to take UV damage, chemical exposure, and minor abrasion so the color underneath doesn’t have to.
Mineral deposits that sit on clear coat long enough can etch a shallow depression into that polymer layer, which is why some spots don’t wipe away. They’ve physically altered the surface.
Glass has no clear coat buffer at all. It’s a single hard, non-porous surface, so mineral deposits tend to sit purely on top rather than bonding into a soft layer, but they can still etch glass if left long enough under heat.
That structural difference is the reason a method safe for your windshield can be entirely wrong for your hood.
How Do You Tell Surface Deposits From Etched Water Spots?
Before you touch a bottle of anything, figure out what you’re actually dealing with. Treating an etched spot like a surface deposit wastes your time. Treating a surface deposit like an etched spot risks damage you didn’t need to risk.
Two simple diagnostic tests tell you almost everything:
Fingernail test: Run your fingernail gently across the spot. If it feels smooth and the mark is just sitting on the surface, you’re likely dealing with a fresh mineral deposit that hasn’t bonded yet.
Plastic-baggie test: Slip a thin plastic sandwich bag over two fingers and glide it across the paint. Any texture, roughness, or catching you feel through the plastic is a reliable sign the deposit has bonded to the surface rather than resting on it.
Visual cues matter too. A chalky white ring that wipes partially clean under a fingertip is usually a Type 1 surface spot. A spot with a faded, ghosted outline that won’t budge under light rubbing, or one where you can see a shallow concave crater when light hits it at an angle, has moved into Type 2 or Type 3 etching territory.
If you’re looking at multiple etched spots across several panels, or a crater you can feel with your fingertip even through a baggie, accept now that chemical cleaners alone won’t fix it. That’s a job for polishing or professional paint correction, not a weekend vinegar session.
Pro Tip: Test in a small, inconspicuous spot first, like a lower door edge, before treating an entire panel. Some clear coats respond differently to vinegar than others, and you’ll want to know that on a two-inch patch, not your hood.
The Step-by-Step Removal Ladder for Painted Panels
Work from gentlest to most aggressive, and stop as soon as the spot is gone. Every step you skip past unnecessarily is clear coat you didn’t need to risk.
Distilled white vinegar and distilled water, 50/50. Mix in a spray bottle and apply to a cool panel in the shade, never in direct sun or on a hot hood. Vinegar’s mild acidity dissolves the alkaline mineral deposits that plain water washing leaves behind. Let it dwell 30 to 60 seconds, no longer, and never let it dry on the paint. Rinse thoroughly with distilled water and dry immediately with a clean microfiber towel.
Commercial water-spot remover. If vinegar doesn’t fully clear the spot, move to a dedicated product. These come as gels or liquids and are formulated specifically for automotive clear coat, which makes them noticeably gentler than a kitchen-cabinet acid. Apply per the label, keep dwell time short, wipe with a clean microfiber towel, and rinse.
Clay bar or clay mitt. For deposits that have bonded but haven’t etched, knead a clay bar with clay lubricant and glide it across the surface in straight lines, folding the clay to expose a clean face every few passes. Clay shears off bonded surface contaminants mechanically, but it will not touch anything that has actually etched into the clear coat.
Polishing or paint correction. If a crater remains after claying, polishing is the only real fix, because it levels the clear coat itself rather than cleaning its surface. A dual-action polisher is more forgiving for DIY use than a rotary, which cuts faster and punishes a shaky hand. Work through a pad and polish progression, starting with the least aggressive combination that produces results, and track how much clear coat you’re removing with each pass.
Household names like CLR or other heavy-duty mineral removers were never designed for automotive clear coat, and using them risks damaging the finish far more than the spots ever would. Skip anything from under the kitchen sink.
Pro Tip: Work in the shade on a panel you can comfortably touch with a bare hand. If the metal feels warm, wait. Heat causes any acid or cleaner to flash dry before it can lift the deposit, and a dried acidic residue on paint is its own problem.
Removing Hard Water Spots From Glass Safely
Glass gives you more room to work aggressively than paint does, but only up to a point, and only with the right tools.
Start with a standard glass cleaner or the same 50/50 vinegar and distilled water mix used on paint. Spray, let it sit briefly, then rinse with distilled water and dry with a lint-free towel to avoid leaving new streaks or minerals behind.
For deposits that won’t lift with vinegar alone, a micro-abrasive glass polish is the next step. Apply a small amount to an applicator pad, work it in small circular motions, and buff clean before it dries fully on the glass.
Professionals sometimes reach for wet #0000 grade steel wool on stubborn windshield mineral bonds, because glass has no clear coat to scratch through. This tool is strictly for bare exterior glass. Never use it on painted trim, and never use it anywhere near tinted windows, since it will shred tint film instantly.
Finish with a hydrophobic glass sealant. Water that beads and rolls off doesn’t sit long enough to leave new mineral deposits, which is the whole point of treating glass in the first place.
Pro Tip: If your windshield has a rain-sensing wiper module or ADAS camera bracket near the glass, keep steel wool and abrasive polish well clear of that zone. A scratch there can interfere with the sensor’s view.
Getting Clay and Polishing Right Without Overdoing It
Claying and polishing are where most DIY jobs go wrong, usually from impatience rather than bad information.
Fold your clay bar to a fresh, flat face every four or five passes. Once it picks up grit, continuing to use that same face just drags contaminants back across your paint like sandpaper. You’ll know clay has worked when the surface glides smoothly under your fingertips with no catching at all, matching the baggie test you ran earlier.
Polishing is a different animal because it removes material rather than lifting contaminants off the surface. Machine polishing takes off a microscopic layer of clear coat with every pass, and experienced technicians track that removal across multiple passes to avoid thinning the clear coat past a safe margin.
Choose the least abrasive polish and pad combination that produces a visible result before stepping up to anything more aggressive.
Keep a dual-action polisher at a moderate speed setting rather than pushing it to maximum on your first pass.
Stop and reassess after every two or three passes rather than grinding continuously on one spot.
If etching is deep enough that leveling it would mean removing more clear coat than is safe, or if it spans multiple panels, that’s your signal to call a professional rather than keep pushing. A qualified technician should walk you through what they’re seeing, show you a clear coat thickness reading if they take one, and put the planned correction steps in writing on your estimate before starting.
How to Stop Hard Water Spots From Coming Back
Removal only solves today’s problem. Preventing recurrence is a routine, not a one-time fix.
Dry the car immediately after washing. A waffle-weave or twisted-loop microfiber towel absorbs water fast without dragging grit across the paint, and a dedicated blower removes water from door jambs and mirror crevices a towel can’t reach.
Protect the surface on a schedule. Wax lasts a matter of weeks and needs frequent reapplication. A sealant stretches that to a few months. A ceramic coating can hold up for a year or more, giving mineral deposits far less surface to bond to in the meantime.
Use a spot-free final rinse. Deionized or distilled water carries no minerals, so it dries without leaving anything behind. A DI filter attached to your garden hose is a low-cost way to get this at home, and many professional wash locations now offer a spot-free rinse option.
Watch where and how you park. Avoid parking under sprinklers on a timer, and shade cuts down on the sun-accelerated bonding that turns a fresh deposit into an etched one overnight.
Running a quick check after every wash, rather than waiting until spots are obvious, keeps this a five-minute habit instead of a weekend project.
When to Call Phenomenal Auto Care for Hard Water Removal
Some jobs are worth handing off. If you’re looking at etching across multiple panels, or you’re not confident judging how much clear coat a polishing pass is removing, that’s the point where a DIY attempt risks doing more harm than the spots themselves.
Phenomenal Auto Care runs a dedicated Hard Water Removal service built around that exact escalation ladder: diagnose the severity first, apply the least aggressive chemistry that will work, clay where deposits have bonded, and polish only where etching demands it. For clients wanting the etching fixed and the finish protected against a repeat, we pair that removal work with paint correction and a ceramic coating in the same visit.
Because service comes to your driveway, you skip the drop-off and pickup entirely. That convenience, backed by a 5-star rating across more than 250 customers and several community awards, is why a lot of Arizona drivers stop treating water spots as a recurring chore.
Comparing Commercial Water-Spot Removers
Not every bottle labeled “water spot remover” performs the same way, and the differences matter once vinegar alone hasn’t cleared a spot.
Product type | How it works | Strengths | Trade-offs |
Gel-based removers | Clings to vertical panels longer, giving mineral deposits more contact time | Good for hoods and doors where liquid runs off fast | Slower to rinse, can leave residue if not fully removed |
Liquid spray removers | Thinner formula, applied and wiped quickly | Fast to use, works well for light, fresh deposits | Runs off vertical surfaces before it can dwell |
Acid-based professional formulas | Stronger mineral-dissolving chemistry than vinegar | Handles moderate deposits vinegar can’t touch | Needs careful dwell-time control to avoid clear coat damage |
All-in-one wash and wax removers | Combines mild spot treatment with a protective layer | Convenient for routine maintenance washes | Too weak for anything beyond very light, fresh spots |
Whatever you choose, follow the manufacturer’s dwell time exactly and never let any of these products dry on the panel. The formulas built specifically for clear coat will always be a safer bet than a general-purpose household cleaner, even a strong one.
Using a Clay Bar Specifically for Water Spots
Clay bar treatment has one job: lifting bonded surface contaminants that plain washing and vinegar leave behind. It’s a mechanical fix, not a chemical one, so the technique matters more than the product you buy.
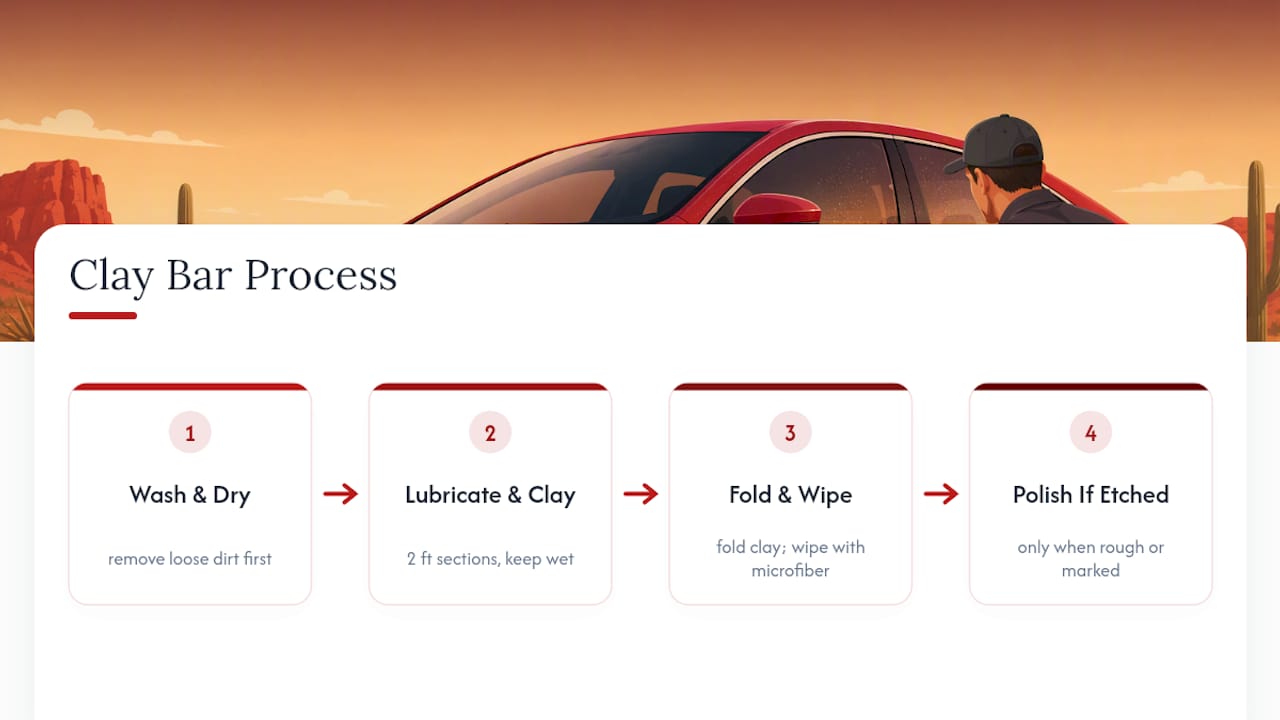
Wash and dry the panel first so you’re not claying over loose dirt. Spray a generous amount of clay lubricant onto a small section, roughly two feet square, and never work the clay dry. Knead a golf-ball-sized piece of clay into a flat disc and glide it across the lubricated section using light pressure and straight, overlapping lines rather than circles.
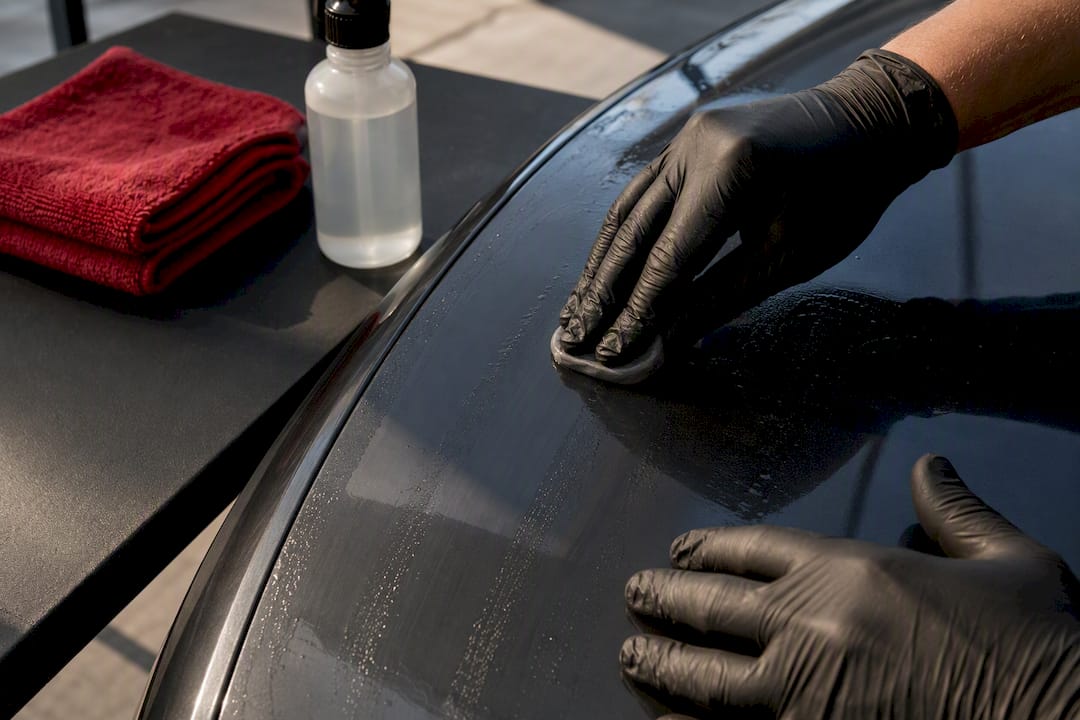
You’ll feel the clay grab slightly at first if contaminants are present, and that grabbing should smooth out as the section clears. Fold the clay to a clean face every few passes, since a dirty face just redeposits grit back onto your paint. Wipe the section dry with a clean microfiber towel and run the baggie test again to confirm it’s smooth.
Move section by section around the entire car rather than trying to clay the whole vehicle in one lubricated pass. If a spot still feels rough or shows a visible mark after claying, that’s confirmation you’re dealing with etching, and claying has done all it can do. Polishing is the next and final step.
Keeping Water Spots From Becoming a Recurring Problem
The owners who stop dealing with water spots long term aren’t the ones who found a magic product. They’re the ones who changed a habit or two.
The single biggest lever is what touches your car last after every wash. If that’s tap water left to air dry, you’re reintroducing minerals every single time no matter how well you cleaned beforehand. Switching your final rinse to distilled or deionized water breaks that cycle completely, and it costs very little compared to the paint correction work needed to undo months of neglect.
Coating maintenance is the second lever. A wax layer needs refreshing every few weeks to keep doing its job, which is realistically more upkeep than most owners commit to. A ceramic coating shifts that maintenance window out to a year or more, which is a big part of why it’s become the default recommendation for anyone tired of fighting the same spots every season.
Finally, track where the car spends its time parked. A vehicle that sits under a tree that drips sap and pollen, or near a sprinkler system on an automatic timer, is going to reaccumulate spots faster than one parked in a covered garage regardless of how well you clean it. Small changes to parking habits often do more than any product swap.
A Professional Detailer’s Perspective on Hard Water Spots
The biggest mistake we see isn’t the wrong product. It’s skipping diagnosis and reaching straight for the strongest thing on the shelf. Test first, start gentle, and let the spot tell you what it actually needs.
Build a routine around it: a quick fingertip check after every wash, a proper dry-and-protect cycle, and a professional inspection if spots keep resurfacing despite your best habits at home.
— Phenomenal
Book Professional Hard Water Spot Removal in Arizona
Vinegar, clay, and careful polishing handle most water spots if you’re patient and methodical. But if etching has spread across several panels, or you’d rather not risk your clear coat learning polishing technique for the first time on your own car, Phenomenal Auto Care gives you a faster, safer route to the same result, done at your home or office instead of a shop drop-off.

Our Hard Water Removal service starts with the same diagnosis-first approach covered above, then applies the right chemistry and mechanical correction for what your paint actually needs, not a one-size-fits-all treatment. For vehicles that need the etching leveled entirely, we scope that as paint correction, and most clients pair the fix with a ceramic coating so mineral deposits have far less chance of bonding again. If you’re weighing your options, this partner guide on safe removal steps is a solid supplementary read. When you’re ready, check our full service list and book a visit for your Arizona driveway.
Sources
FAQ
Does WD-40 Remove Hard Water Spots on a Car?
WD-40 isn’t formulated to dissolve mineral deposits and can leave an oily residue that attracts dust and complicates future polishing. Stick with a 50/50 distilled white vinegar and distilled water solution or a dedicated commercial water-spot remover instead.
What Causes Hard Water Spots on Cars?
Hard water spots form when water containing calcium and magnesium evaporates off your car and leaves those minerals behind on the paint or glass. Sun and heat speed up that evaporation and can bake the deposit into an etched mark if it sits too long.
What Dissolves Hard Water Spots?
A 50/50 mix of distilled white vinegar and distilled water dissolves most fresh, unetched mineral deposits when applied to a cool panel and rinsed promptly. For deposits that resist vinegar, a commercial water-spot remover or, for etched spots, a clay bar followed by polishing is the correct next step.
Will Dawn Dish Soap Remove Water Spots?
Dawn can help lift loose surface grime during a regular wash, but it isn’t acidic enough to break down bonded mineral deposits the way vinegar or a dedicated water-spot remover can. For actual hard water spots, treat with vinegar first and escalate from there rather than relying on dish soap.
When Should I Hire a Professional for Water Spot Removal?
Call a professional when etching spans multiple panels, when a crater is visible under angled light, or when you’re unsure how much clear coat a polishing pass is safely removing. Phenomenal Auto Care’s Hard Water Removal service handles that diagnosis and correction directly, with current pricing available on the site.
Recommended
Comments