
Door Cup PPF: The DIY-Friendly Fix for Handle Scratches
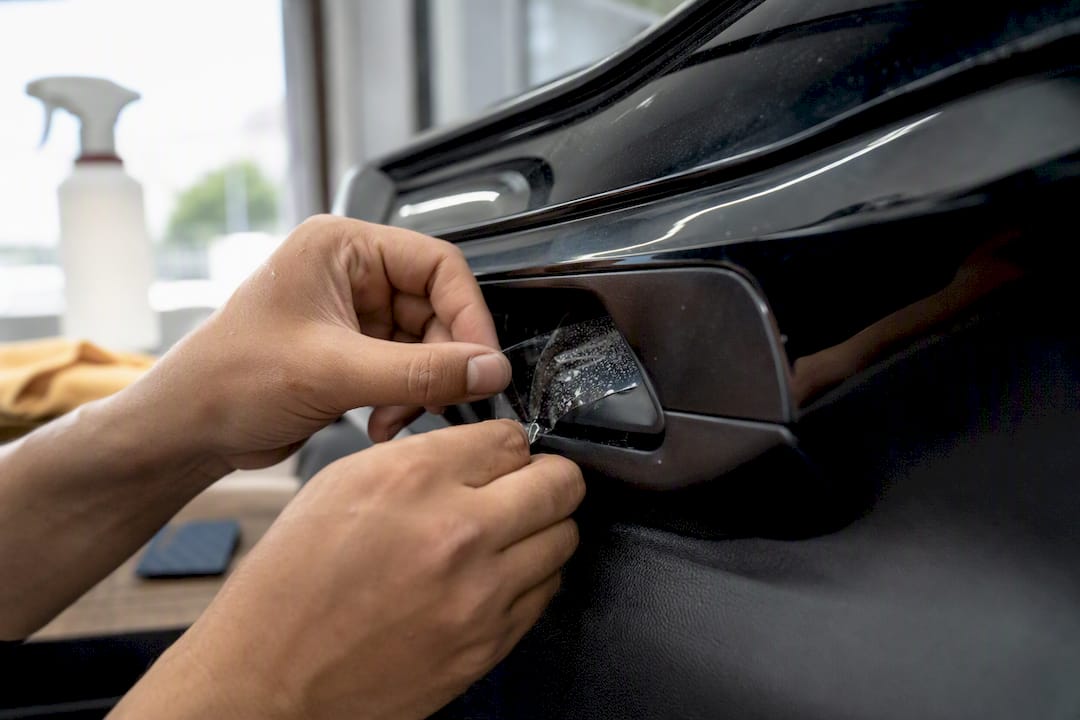
Door cup paint protection film stops the fingernail gouges, ring scrapes, and key scratches that chew up the paint behind your door handles. It’s a thin, nearly invisible layer of polyurethane that absorbs the daily abuse your fingers put on that one recessed spot every single time you open the car. For most drivers, a precut kit and a Sunday afternoon are enough to solve the problem. For a factory-perfect finish on a curved or deep cup, professional installation closes the gap DIY often leaves behind.
Here’s how to decide which path fits your situation:
Go DIY if your door cups are shallow, gently curved, and you’re comfortable with a squeegee and a hair dryer.
Hire a pro if your cups are deep, multi-angled, or you’re installing PPF alongside ceramic coating or paint correction work.
Before either route, measure your door cup dimensions and inspect the paint for existing swirl marks or chips.
If booking, Phenomenal Auto Care handles precision installs across the Phoenix area with plotter-cut precision and paint prep included.
Key Takeaways
Door cup PPF reliably prevents fingernail, ring, and key scratches behind handles when installed with proper surface prep, correct film thickness, and either patient DIY technique or professional plotter-cut precision.
Point | Details |
Film specs matter | Look for 7.5 to 10 mil polyurethane with a self-healing topcoat rather than unlabeled thin film. |
Prep decides success | Clean with soap and 70% isopropyl alcohol before applying any slip solution or film. |
Heat solves deep curves | Low heat from a hair dryer lets film conform to sharp cup contours without wrinkling. |
Universal kits have limits | Deep or multi-level cups often need trimming, heat shaping, or a custom plotter-cut template. |
Professional installs add coverage | Phenomenal Auto Care pairs paint correction and plotter-cut precision with a workmanship guarantee DIY kits don’t include. |
Table of Contents
What Is Door Cup PPF and How Does It Protect Your Paint?
Door cup PPF is a cut piece of polyurethane film, typically about 7.5 to 10 mils thick (0.19 to 0.25 mm), shaped to fit the recessed handle pocket on your car door. That thickness range comes up consistently across precut kits sold for popular truck and SUV models, and it’s thick enough to absorb a fingernail or ring scrape without transferring the damage to your clear coat underneath.
The better films in this category carry a self-healing topcoat. Minor surface scratches can actually disappear when the film warms up, whether from a heat gun during install, a hot Arizona afternoon, or even hot water from a hose. The polymer chains in the topcoat relax back into place, and light marks smooth themselves out over time. This is a real feature on premium Pro Series door cup film, not marketing fluff, though it works better on hairline marks than deep gouges.
Compare that to the thicker vinyl or hard plastic guards some owners bolt or stick onto their door cups. Those guards are more resistant to a hard impact, but they look like an aftermarket add-on, and they don’t flex with the door’s contour the same way. PPF wins on invisibility. A guard wins on raw physical toughness. Most drivers care more about keeping the factory look intact than surviving a direct impact from a dropped tool.
You’ll also choose between:
Precut kits, sized for a specific make and model, usually sold in packs of two to six pieces.
Bulk film sheets, which give you flexibility for odd-shaped cups but require you to cut your own template.
Statistic to know: Commercially available precut kits commonly ship as 7.5 mil polyurethane film with an extra practice piece included, which tells you something important: even manufacturers expect first-timers to mess up at least once.
What Are the Real Benefits and Limits of Door Cup PPF?
PPF earns its reputation by stopping the small, repetitive damage that actually happens behind a door handle. Fingernails, rings, watches, and keys are the usual suspects, and PPF absorbs all three without a mark reaching your paint.
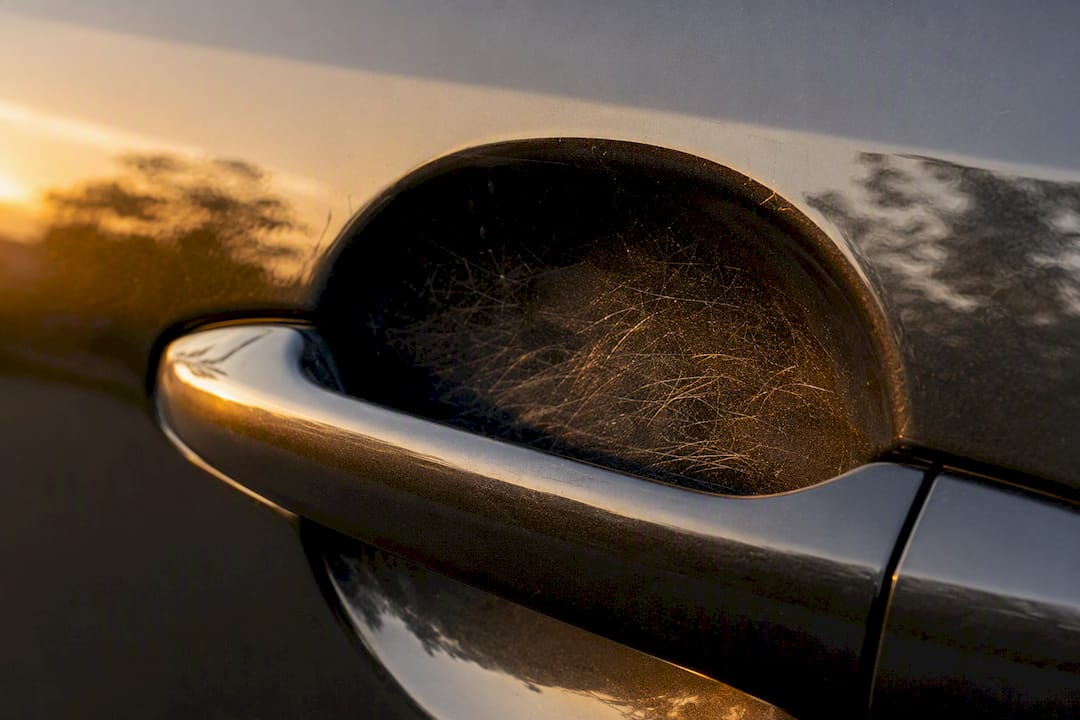
What it won’t do is save you from a hard impact, like a shopping cart or a dropped tool striking the door edge. The film is thin by design. It’s built to be invisible, not armored. If you’re worried about that kind of blunt trauma, a physical guard or careful parking habits matter more than film thickness.
The resale case is straightforward. Door cups are one of the first places a used-car buyer or appraiser looks for wear, precisely because they’re so exposed. Industry commentary on paint protection consistently points to door handle areas as high-abuse zones that get overlooked until it’s time to sell. Keeping that spot scratch-free preserves the factory finish underneath, which matters more at trade-in time than most owners realize.
Lifespan depends heavily on film quality. Premium films with UV stabilizers and self-healing topcoats often carry manufacturer coverage in the five to ten year range. Cheap PVC based films, by contrast, tend to yellow within a year or two of sun exposure, especially in a hot, high UV climate.
Keeping the film performing well requires very little:
Wash the area gently; avoid abrasive brushes directly on the film edges.
Reapply a UV-protectant spray periodically if you’re in intense sun year round.
Inspect edges every few months for lifting, and re-seat them early before dirt gets underneath.
How Do You Choose the Right Door Cup PPF Kit?
Picking the right kit comes down to matching film specs to your car and your patience level. Run through this checklist before you buy:
Confirm the film thickness. Look for 7.5 to 10 mil polyurethane rather than unlabeled “clear film” listings with no thickness spec at all.
Check for a self-healing topcoat. This is usually stated directly in the product description; if it’s not mentioned, assume it’s a basic film without that feature.
Verify adhesive type. Automotive-grade acrylic adhesives handle heat cycling better than generic sticker adhesive.
Look for UV stability claims. This matters more in sun-heavy climates than in cooler, cloudier regions.
Measure your door cups. Get the height and width of the recessed area, then add roughly a quarter inch of overhang on precut pieces so you have material to trim rather than a piece that comes up short.
Check the pack count. Kits with four to six pieces per set usually include at least one spare, which matters because your first attempt is rarely your cleanest.
Decide if universal fits your car. If your door cups are deep, angular, or oddly shaped, a “universal” precut piece may need heavy trimming or heat shaping to lay flat, and a plotter-cut template matched to your exact model will save you frustration.
Universal kits work fine for shallow, simple cups. Once you’re dealing with a multi-level cup or sharp interior angles, a custom or plotter-cut pattern gets you a cleaner edge with far less wrestling.
How Do You Install Door Cup PPF Yourself?
Installing door cup PPF is genuinely doable in an afternoon if you follow the sequence in order and don’t rush the prep. Skipping steps is where almost every bad install goes wrong.
Tools and supplies you’ll need:
Slip solution: water with one to three drops of dish soap or baby shampoo, mixed in a spray bottle.
A second spray bottle with 70% isopropyl alcohol for cleaning.
A hard squeegee (felt-edged is gentler on film).
Microfiber towels, at least two.
A hair dryer or heat gun set to low heat.
Sharp scissors and a pair of tweezers for fine trimming.
Step 1: Clean the door cup thoroughly.
This step matters more than people expect. Any leftover wax, dust, or oily residue creates a spot where the adhesive won’t bond, and that spot becomes tomorrow’s bubble. Manufacturer installation guidance treats this cleaning step as non-negotiable, and it’s the single most skipped step by first-timers.
Step 2: Spray slip solution generously.
Coat both the painted surface and the adhesive side of the film liberally. Don’t be shy here. The slip solution is what lets you slide the film into position without it grabbing prematurely, and it also helps you spot air bubbles before you squeegee them in permanently.
Step 3: Position the film and squeegee outward.
Lay the film onto the wet surface and align it with the edges of the cup. Anchor the center first with light pressure, then squeegee outward in overlapping strokes, working from the middle toward the edges. If you see the film sliding out of alignment, lift a corner, re-spray, and reposition. This is normal and expected on your first piece, not a sign you’re doing it wrong.
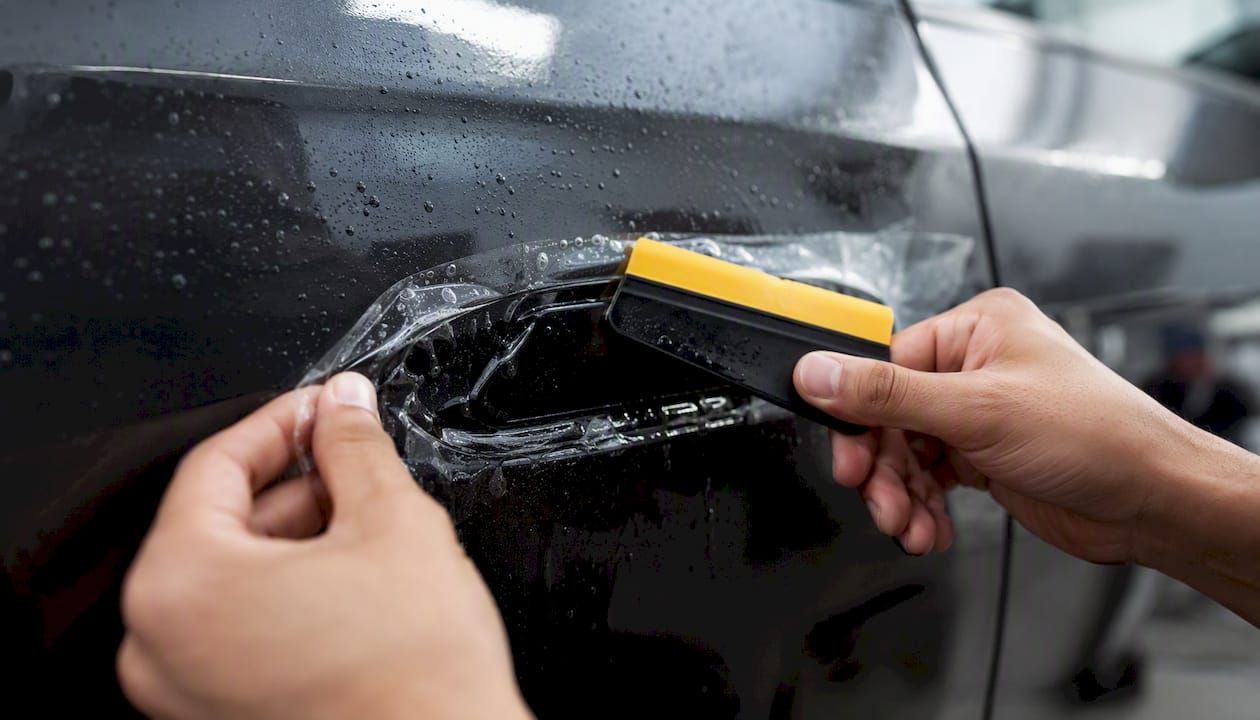
Step 4: Heat, trim, and cure.
Deep curves or sharp interior corners rarely lay flat with squeegee pressure alone. Use the hair dryer on low heat, held about six inches away, to soften the film just enough that it stretches into the contour without wrinkling. Trim excess film with sharp scissors for a clean edge, tucking slightly under the lip of the cup where possible rather than leaving a raw edge exposed to fingernails.
Let the install cure for 48 hours before pressure washing the door or subjecting it to heavy daily handle use. The adhesive needs that window to fully bond.
Pro Tip: Do your first piece on the rear door cups, not the front ones you touch most often. You’ll get more practice reps before tackling the panels everyone actually looks at, and rear door cups are usually a simpler shape to learn on.
Common mistakes that ruin an install:
Skipping the alcohol wipe down, which leaves invisible residue under the adhesive.
Using too little slip solution, which causes the film to grab before you’re aligned.
Overstretching the film to force it into a tight curve, which thins the polyurethane and creates a visible strain mark.
How Do You Fix Bubbles and Fitment Problems?
Bubbles and lifted edges are the two most common complaints from first-time installers, and both are fixable without starting over. If you spot a bubble after the film has set, lift the nearest edge carefully, re-spray slip solution underneath, and squeegee it back out toward that same edge. For stubborn bubbles trapped in a tight curve, a few seconds of low heat softens the film enough to release trapped air without damaging the adhesive.
Edge lift usually means the perimeter didn’t get enough squeegee pressure during install, or the trim line landed on a high point in the cup’s contour rather than a low, protected groove. Re-squeegeeing a lifted edge with fresh slip solution solves most cases. If the edge keeps lifting in the same spot, that spot is likely getting flexed every time the door opens, and a tiny dab of edge sealant made for PPF can lock it down.
Not every imperfection needs a redo. A slightly visible trim line an inch inside the cup, where nobody’s eye naturally lands, is fine to leave alone. A wrinkle or bubble sitting dead center where your thumb rests every day is worth re-cutting.
Some cup shapes consistently give universal kits trouble: deep buckets with a sharp interior lip, multi-level cups with a stepped profile, and handles with an integrated keypad or sensor housing. These geometries are exactly where plotter-cut templates outperform generic precut pieces, because the cut pattern is generated from the actual panel contour instead of an approximate universal shape.
Pro Tip: If you’re on your second or third attempt at the same cup and still fighting wrinkles, that’s your signal the shape needs a custom cut, not more patience.
Should You DIY Your Door Cup PPF or Hire a Professional?
The decision usually comes down to five factors: how complex your door cup shape is, the current condition of your paint, how much finish imperfection you’re willing to live with, your budget, and how much time you actually want to spend on it.
DIY tends to make sense when:
Your door cups are shallow and gently curved.
Your paint is already in good condition with no swirls or chips to address first.
You’re comfortable spending an hour or two per panel, including a few do-overs.
Budget is the priority over a flawless finish.
Professional installation tends to make sense when:
Your door cups are deep, angular, or have an integrated sensor or keypad.
You want paint correction done first to remove existing swirl marks before sealing the surface with film.
You’re already booking ceramic coating and want the door cup protection matched to that same appointment.
A visible seam or trim line anywhere on the panel is unacceptable to you.
What a professional install actually adds isn’t just steadier hands. It’s surface correction before the film goes on, plotter-cut templates matched to your exact vehicle contour instead of a generic universal shape, and edge finishing that tucks cleanly rather than leaving a visible trim line. Most professional installs also come with aftercare guidance and a warranty on the workmanship itself, not just the film material.
If you decide a pro install fits your situation, Phenomenal Auto Care’s paint protection film service covers door cups as part of a broader install, and scheduling is straightforward through their location pages. Expect the visit to include a paint inspection, surface prep, and a walkthrough of care instructions before you drive off.
Why Phenomenal Auto Care’s Approach to Door Cup Protection Works
Phenomenal Auto Care has built its reputation on precision work delivered where you are, not just what you bring into a shop. That reputation shows up in a 5-star rating backed by more than 250 satisfied customers across Arizona, along with community awards that reflect consistency over years, not a single good month.
For door cup PPF specifically, that experience matters because the panel geometry varies so much from one vehicle to the next. Here’s what a visit typically includes:
A paint inspection to check for existing swirls, chips, or contamination before film goes on.
Surface prep and, when needed, paint correction to give the film a clean, defect-free surface to bond to.
Precision-cut film application with attention to edge finishing so seams stay tucked and protected.
Post-install guidance on cure time and care, so the film performs the way it’s designed to.
The mobile model means this happens at your home or office rather than requiring a drop-off and a second trip to pick your car back up.
Do DIY Kits and Professional Installs Carry the Same Warranty?
No, and the difference matters more than most first-time buyers realize. DIY kits typically carry a manufacturer warranty on the film material itself, covering defects like premature yellowing or adhesive failure under normal conditions. That warranty almost never covers installation errors. If a bubble forms because you rushed the squeegee step, or an edge lifts because the surface wasn’t properly cleaned, that’s on you, not the film maker.
Professional installations usually bundle two layers of coverage: the same manufacturer warranty on the film, plus a workmanship guarantee from the installer covering the actual application. That second layer is what protects you if a professionally installed edge lifts or a bubble appears within the coverage window, since a legitimate installer will come back and correct it at no charge.
This is one of the clearest arguments for going professional if the cup shape on your vehicle is complicated. A tricky multi-level cup that’s hard to get right the first time is exactly the scenario where installation-error risk is highest, and exactly where a workmanship warranty earns its value. Before booking anywhere, ask directly what the workmanship guarantee covers and for how long. Not every shop offers the same terms, and the difference between “we’ll fix defects” and “we’ll fix anything within a year” is worth clarifying up front.
What Most Guides Get Wrong About Door Cup PPF
Most DIY guides treat every door cup as roughly the same problem, and that’s the biggest gap in the conventional advice. A shallow, gently curved cup and a deep, stepped cup with a keypad housing are not the same installation job, and pretending otherwise is why so many first-timers give up after one frustrating attempt on a shape that never suited a universal precut piece to begin with.
The other overrated idea is that self-healing topcoats make film maintenance-free. They handle light surface marks well, but they don’t undo neglect, and cheap PVC film in Arizona sun will yellow regardless of how the listing describes it.
What actually matters, based on everything the installation process reveals, is matching effort to geometry. Simple cups reward patience and a hair dryer. Complicated ones reward admitting early that a custom-cut template or a professional visit will save you three ruined practice pieces and a still-imperfect result.
— Phenomenal
Get Door Cup PPF Installed Right the First Time
If a DIY kit sounds like more trial and error than you want to sign up for, Phenomenal Auto Care installs door cup PPF as part of a mobile detailing visit that comes to you, so there’s no dropping the car off and waiting around a shop. Every install starts with a paint inspection and prep, which means bubbles, edge lift, and mismatched trim lines from a rushed universal kit aren’t something you have to troubleshoot yourself.
This matters most if your door cups are deep, curved, or paired with a keypad housing, exactly the shapes that give precut kits the most trouble. Pair the install with ceramic coating or paint correction on the same visit, and you walk away with protected door cups and a finish that matches the rest of the vehicle. Book a mobile detailing appointment through Phenomenal Auto Care’s Mesa service page or check availability at your closest Arizona location to get started.
Sources
Recommended
Comments